Adding a patient and inviting their family is one continuous task. This page walks the whole thing: the dialog, the programs you turn on, the email that goes out, and the code the family enters.
Invite a family
From Patients → Add New Patient, or quick-add from a Calendly event.
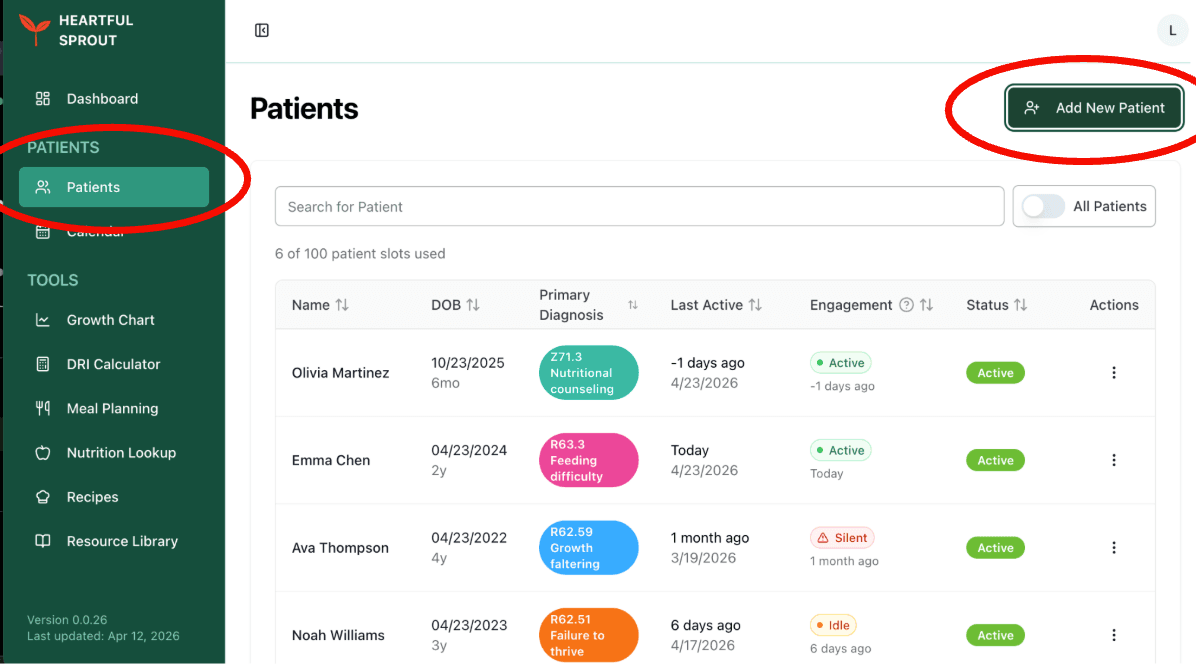
At your plan's patient cap, the button reads Upgrade Plan For Higher Patient Limit and links to Billing. Viewers don't see the button at all.
1. Add the patient
Four sections, top to bottom.
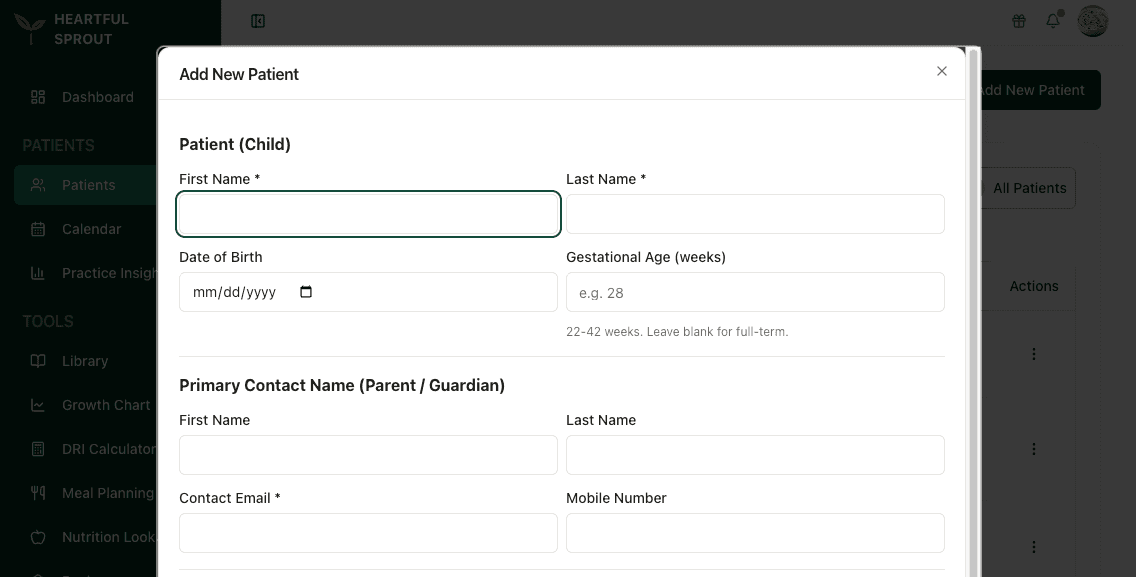
1. Patient (Child)
| Field | Required | Notes |
|---|---|---|
| First / Last name | ✓ | |
| Date of Birth | Drives age-based DRI targets and chart selection | |
| Gestational Age (weeks) | 22–42; leave blank for full-term. Enables preterm growth charting and corrected age |
2. Primary Contact (Parent / Guardian)
| Field | Required | Notes |
|---|---|---|
| First / Last name | ||
| Contact Email | ✓ | Where the invite is sent |
| Mobile Number |
3. Program Access
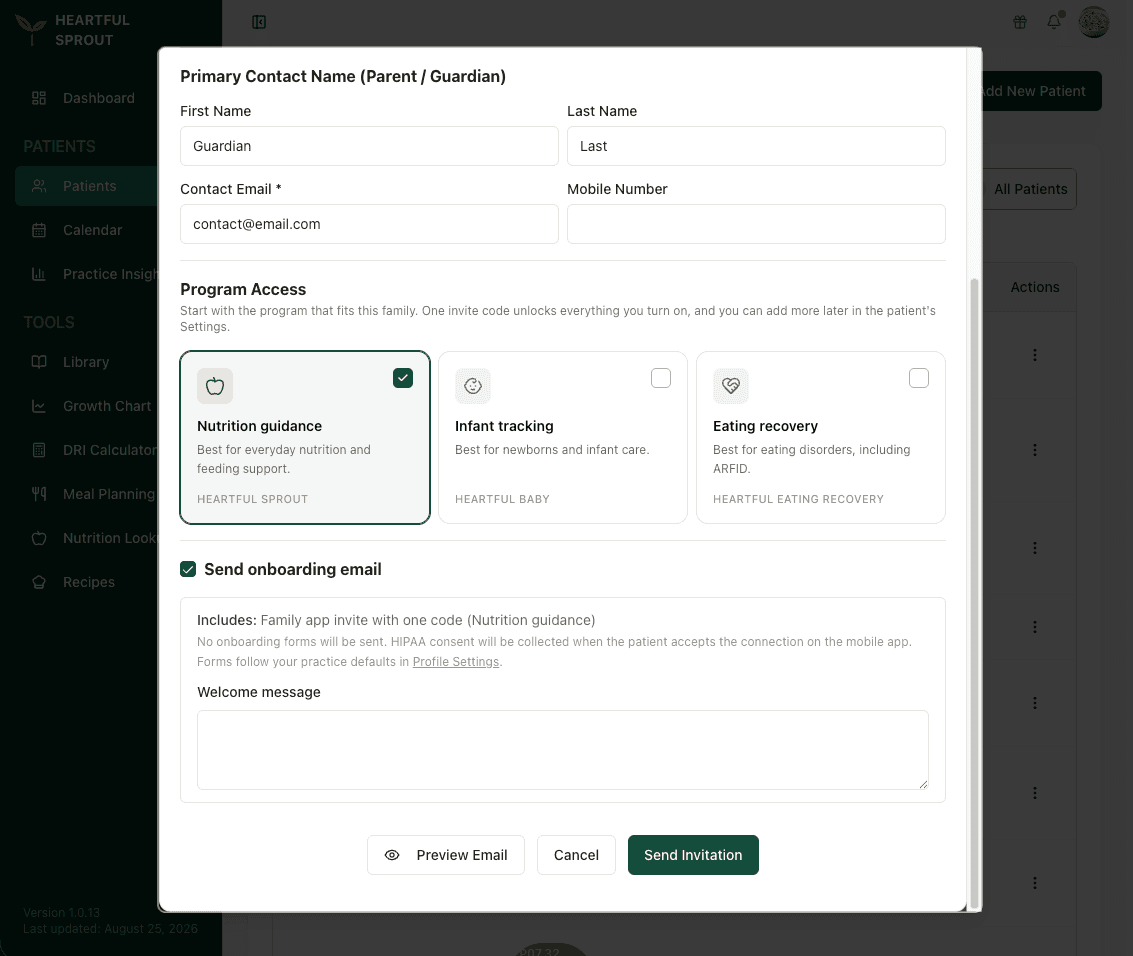
Pick the program(s) that fit the family — Nutrition guidance (Heartful Sprout), Infant tracking (Heartful Baby), Eating recovery (Eating Recovery). One invite code unlocks everything you turn on, and you can add more later from the patient's Settings.
- Nutrition guidance is pre-selected by default.
- Selecting more than one triggers a gentle nudge — most families do best starting with one.
- Select none to create a record-only patient (documentation without an app).
Details: Programs & invite options. Not sure which app fits? See Which app to recommend.
4. Send onboarding email
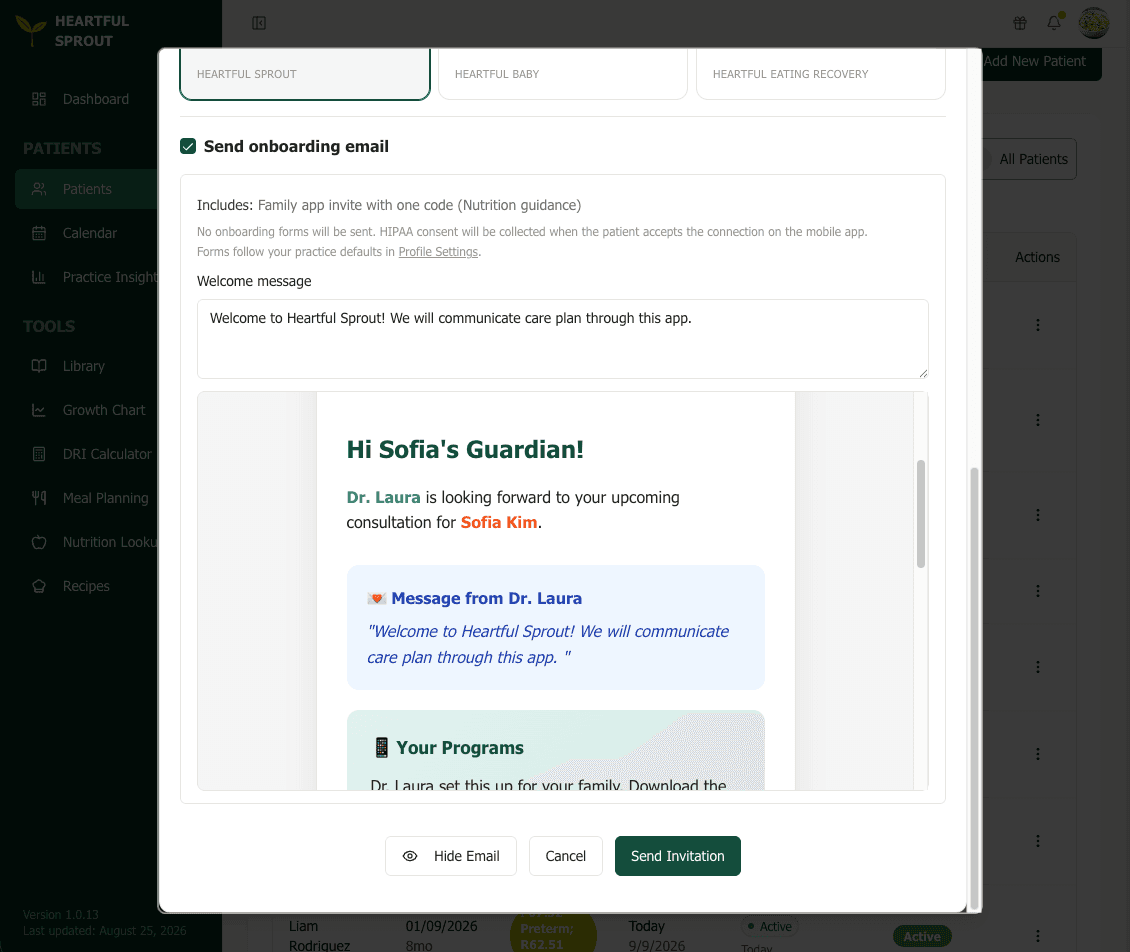
Checked by default. The Includes: line summarises what will be sent, based on your onboarding defaults. Add an optional welcome message, and use Preview Email to see exactly what the family receives.
Clearing the checkbox creates the patient as ACTIVE immediately with nothing sent.
No email means no onboarding forms. Registration, insurance, and custom PDFs all reach the family through the onboarding email — clear the checkbox and there is no way for them to fill any of it out. The dialog flags this when your defaults require forms. Collect what you need in the office instead, or leave the email on.
Submit with Send Invitation, or Create Patient when no email is going out.
2. Choose their programs
Inviting a patient is now organized around programs, not invitation modes. You pick the program(s) that fit the family; the platform mints one invite code that works in every app you turn on.
The three programs
| Program | Patient app | What the family gets | Best for |
|---|---|---|---|
| Nutrition guidance | Heartful Sprout | Meal plans, recipes, and everyday feeding support | Everyday nutrition and feeding support |
| Infant tracking | Heartful Baby | Feeds, diapers, sleep, and growth logging | Newborns and infant care |
| Eating recovery | Eating Recovery | Home practice, check-ins, screeners, and messaging | Eating disorders, including ARFID |
- Programs are multi-select — you can turn on more than one, but most families do best starting with one. The invite dialog will nudge you if you select several.
- You can add or remove programs anytime later from the patient's Patient record → Settings → Program Access. See The Program Access panel.
- Nutrition guidance is pre-selected by default when you add a patient.
What turning a program on does
- Grants the family full premium access to that program's app.
- Provisions the provider connection — there is no longer a separate "with / without connection" choice. Turning a program on always connects the family to your practice once they enter the code.
- Issues (or reuses) the patient's single invite code. The same code unlocks every app you've turned on.
Data starts flowing back to the patient record after the family enters the code and completes HIPAA consent in the app — see HIPAA consent.
Record-only patients (no programs)
Leave every program off to create a record-only patient:
- No invite code, no app connection, no emails.
- You can still document sessions, chart growth, and generate billing documents.
- If there are also no onboarding forms to complete, the patient goes straight to ACTIVE status.
- Turn a program on later from Patient record → Settings → Program Access whenever the family is ready.
The onboarding email
Leaving Send onboarding email checked sends the family their invite code, download links, and any forms your practice requires. Clearing it creates the patient immediately with nothing sent.
What that email carries is set once for your whole practice — see Onboarding email & defaults. To write the invite in your own words instead, use the email templates.
3. The invite code
A short code the family enters in their patient app to unlock premium access and link the app to your practice. One code works in every app you've turned on for the family.
Where to find it
Open the patient's record and go to Settings → Program Access, where the code sits in its own block with the actions for copying, reissuing, and re-sending it. Those actions are described in The Program Access panel.
You can also read the code from the Patients list without opening the record. Open the row's actions menu and choose the patient info option.
When it's generated
- Automatically, the first time you turn on any program for the patient — at invite time or later.
- Replaced (old code invalidated) when you choose Issue a new code.
How the family gets it
- Onboarding email — the code is included automatically, under a "Your Programs" section, along with download links for each app you turned on.
- Your own email — the email templates have a placeholder for the code.
- In person — copy it from the Program Access panel and share it directly.
What happens after the family enters it
The app asks for HIPAA consent. Once they agree, their logs start reaching the patient record and the family status chip flips to Connected.
For the family's side of this, screen by screen, see What patients see when they connect.
What happens when you submit
- The platform mints one invite code for all selected programs and grants the family premium access to each app.
- If the email was sent, automatic reminders follow on day 3 and day 7 until onboarding is complete.
- Find or re-share the code anytime: Patient record → Settings → Program Access. See The invite code.
Quick-add from a Calendly booking
When a Calendly event has an invitee without a matched patient, the calendar shows a Create patient prompt pre-filled with name and email.